Your favorite restaurant recipes, recreated at home — tested and easy to follow.


Ribs are the cook that sold me on the Ninja Woodfire. Brisket proves the machine can do long smoke, but ribs are what you’ll actually make on a regular Saturday — they fit the grate without wrestling, they’re forgiving, and they’re done in an afternoon instead of a full day. A rack of baby backs runs about four to five hours start to finish on this thing, and you get a real smoke ring and a proper bark out of an electric grill that lives on the patio.
The reason it works comes down to how the Woodfire is built. The heat is electric, so it holds your set temperature without you feeding a fire, and the pellets in the little smoke box are there purely for flavor rather than fuel. Add the convection fan circulating heat around a small chamber, and you get even cooking that a cheap offset can’t match at this size. The one real constraint is length: a full rack of spare ribs often has to be cut in half or rolled to fit, where baby backs usually lie flat.
What follows is the method I keep coming back to — a modified version of the classic 3-2-1 approach, tightened up for this specific machine and for baby backs, with the timing adjustments for St. Louis and spare ribs called out where they matter. If you’ve already run Ninja Woodfire Grill chicken wings through the smoke box, the setup here will feel familiar — this is just a longer, lower cook.
Why This Copycat Works
- A modified 3-2-1 method built for the Woodfire’s Smoker mode, not lifted from a full-size pit — the wrap timing is shortened so the ribs don’t overshoot into mush.
- Doneness is called by the bend test and a probe-feel check, not a fixed clock, so it works on baby backs, St. Louis, or spares.
- About 15 minutes of prep; the cook runs roughly 4 to 6 hours depending on the cut.
- Hardest part: not wrapping too long. Over-wrapped ribs fall apart off the bone in the wrong way — clean bite is the goal, not baby food.
Key Ingredients & Substitutions
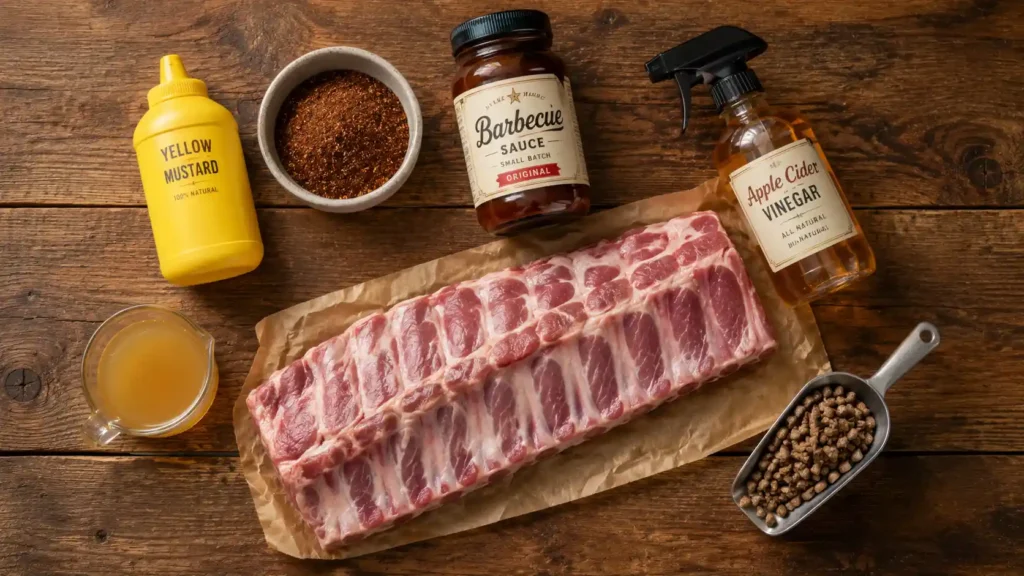
Pork ribs (baby back, St. Louis, or spare). Baby backs are the easiest starting point — shorter, leaner, and they fit the grate flat. St. Louis and spare ribs are meatier and more forgiving of a longer cook, but they’re longer racks that usually need cutting to fit. Whichever you choose, buy them with a decent, even meat covering rather than a rack that’s mostly bone. Ribs live in the pork section of any supermarket; a butcher counter will trim spares to St. Louis-cut on request.
Yellow mustard (binder). A thin coat helps the rub grip and won’t leave any flavor once cooked. Neutral oil, hot sauce, or even a splash of pickle brine all work as substitutes — the binder is doing a mechanical job, not a flavor one.
Dry rub (salt, brown sugar, paprika, pepper, garlic, onion). A balanced pork rib rub leans on brown sugar for bark and a little sweetness, paprika for color, and salt and pepper for the backbone. You can use a good store-bought BBQ rub with no shame; just check whether it already contains salt so you don’t double up. The brown sugar matters here — it’s what caramelizes into that lacquered surface, so don’t skip it for a savory-only blend unless that’s your preference.
Barbecue sauce (for the glaze). Applied only at the end so the sugars don’t scorch over the long cook. Any sauce you like works; a thicker sauce clings better than a thin vinegar one. If you want the tangy Carolina style instead of sweet, that’s a fine swap — just know it won’t lacquer up as glossy.
Apple cider vinegar and apple juice (spritz and wrap liquid). The spritz keeps the surface from drying during the open smoke, and a splash of juice in the wrap steams the ribs tender. Plain water works for the spritz in a pinch; the juice adds a little sweetness that plays well with pork.
Food-grade smoking pellets. The Woodfire needs only a scoop at a time. Apple, cherry, or a mild fruitwood blend suits pork better than an aggressive mesquite. Only ever use pellets labeled food-safe for cooking, never heating pellets.
How to Smoke Ribs on the Ninja Woodfire
You’ll run three phases: an open smoke to build bark and flavor, a wrapped phase to steam the ribs tender, then a short unwrapped glaze phase to set the sauce. Total time lands around 4.5 to 5 hours for baby backs and closer to 6 for meatier spares. This staged approach is what gets you tender-but-not-falling-apart ribs — each phase does one job at the temperature that suits it.
Step 1: Remove the Membrane and Season
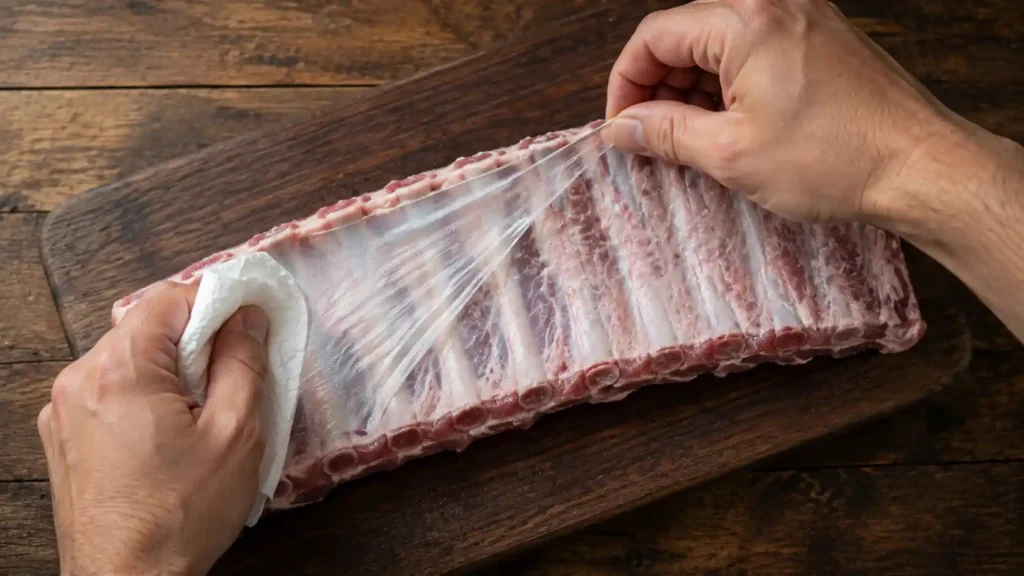
Flip the rack bone-side up and work a butter knife under the thin silverskin membrane at one end, then grab it with a paper towel and peel it off in one piece — this is the single step that separates good ribs from chewy ones, because that membrane never softens and blocks smoke and rub from the back. Pat the rack dry, smear a thin layer of mustard on both sides, then season generously all over with your rub, pressing it in. Let it sit while the grill preheats, or up to overnight in the fridge for deeper flavor.
Pro Tip: If the membrane keeps tearing instead of peeling clean, your grip is slipping — a dry paper towel gives you the traction bare fingers can’t. Some racks come with it already removed, so check the back first; a rack with no shiny, tight skin over the bones is ready to season as-is.
Step 2: Set Up Smoker Mode
Fill the smoke box with a scoop of food-grade pellets and press the Woodfire Flavor button. Set the grill to Smoker mode at 250°F. If the rack is too long to lie flat, cut it in half and stand the pieces slightly apart so smoke can circulate. This is a quick setup step, so no photo is needed here.
Step 3: Smoke Unwrapped to Build Bark
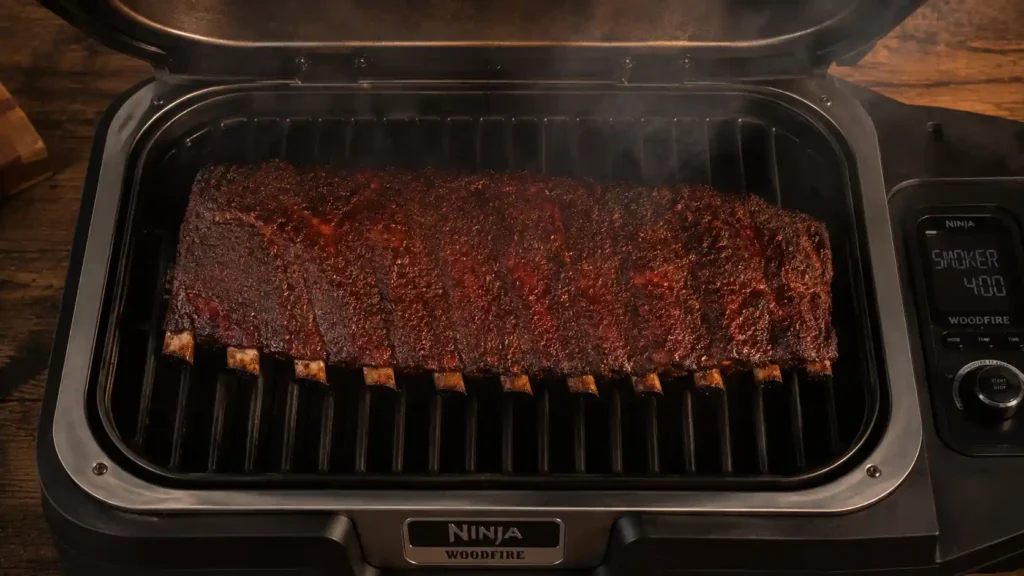
Lay the ribs bone-side down in the center of the grate and close the lid. Smoke at 250°F for about 2.5 to 3 hours, leaving the lid shut for at least the first 90 minutes so the chamber holds heat and smoke. After that, spritz with apple cider vinegar every 45 minutes or so if the surface looks dry. You’re ready to wrap when the bark is set and deep mahogany, the meat has pulled back to expose a little bone at the ends, and the internal temperature reads around 165°F.
Step 4: Wrap and Steam Tender
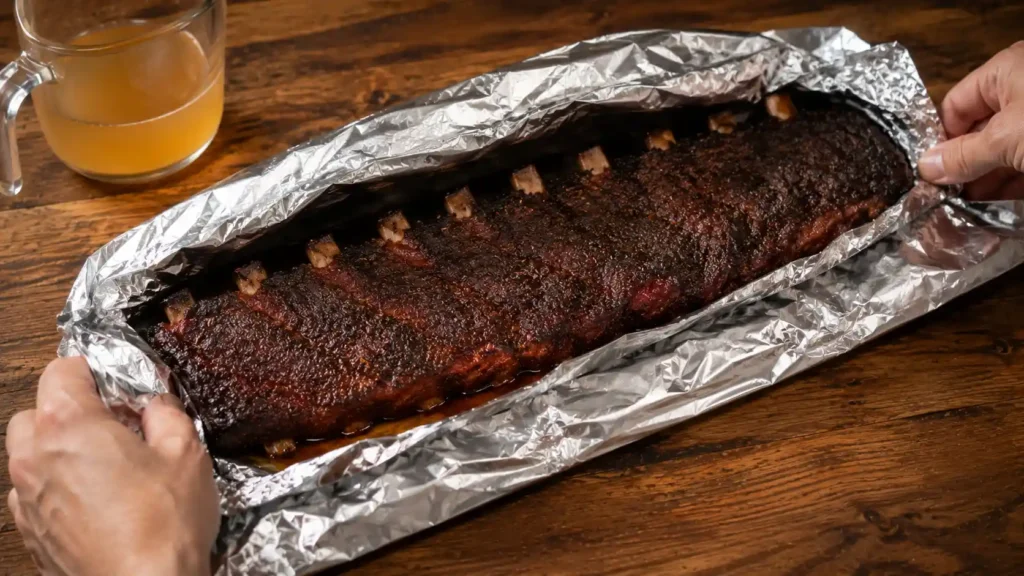
Lay the rack on a double sheet of heavy foil, bone-side up, and add a splash of apple juice — a couple of tablespoons is enough. Wrap tightly so the steam can’t escape, return to the grill at 250°F, and cook for about 1.5 to 2 hours. This is where the connective tissue breaks down and the ribs go tender. Baby backs need less time here than spares; start checking at the 1.5-hour mark, because this is the phase where ribs most easily go from perfect to mushy.
Step 5: Glaze and Set the Sauce
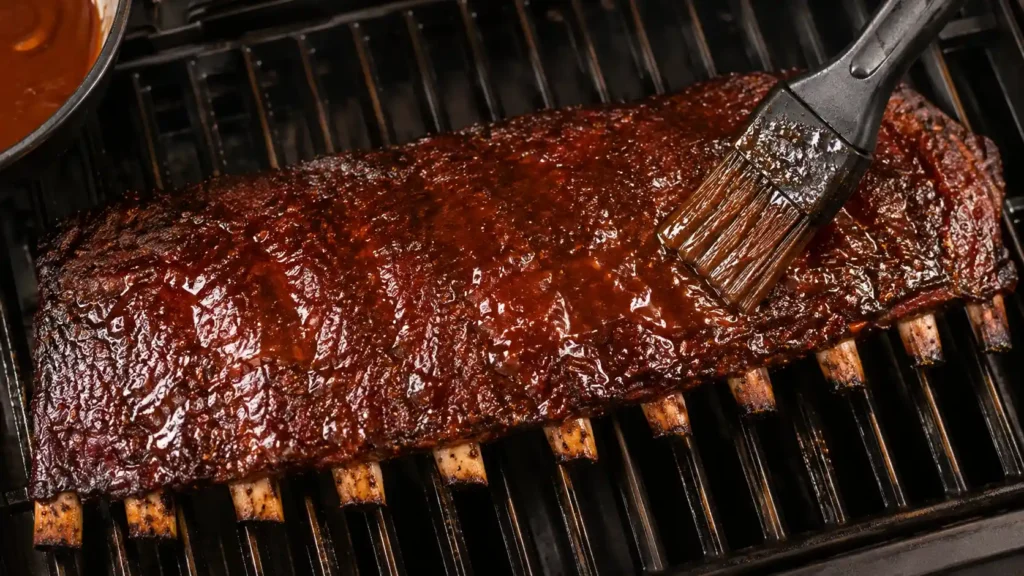
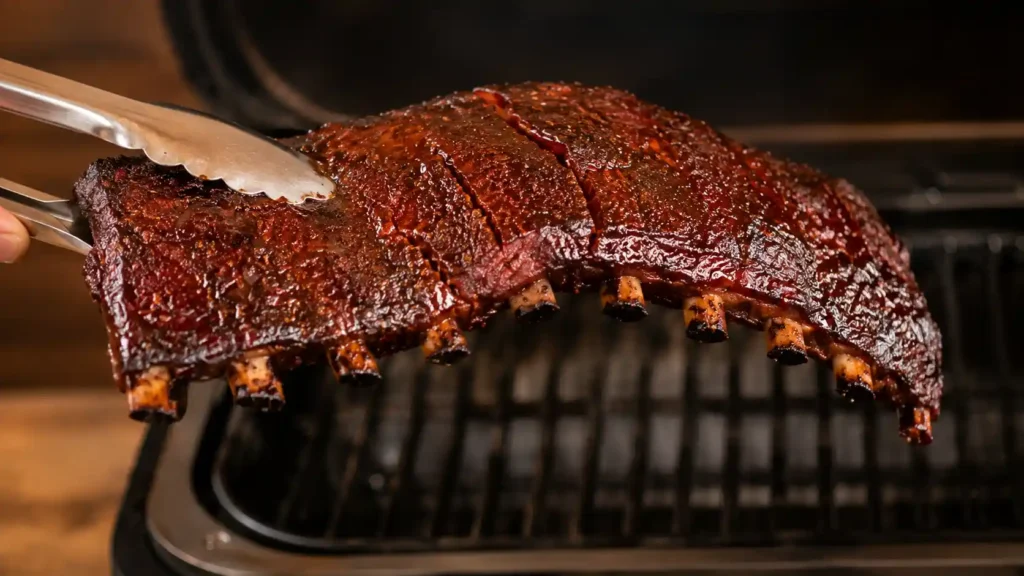
Unwrap the ribs, brush both sides with barbecue sauce, and return them to the grate unwrapped for a final 20 to 30 minutes at 250°F. This dries and tacks the glaze into a sticky, glossy coat rather than a wet smear. If you want a firmer set, brush a second thin coat halfway through. Do the bend test to confirm doneness: lift the rack with tongs from one end — it should sag and the surface should crack slightly, but the rack shouldn’t break apart. Rest 10 minutes before slicing between the bones.
Why the Standard 3-2-1 Overcooks on This Machine
The classic 3-2-1 method — three hours smoke, two hours wrapped, one hour glazed — was written for full-size smokers running big spare ribs, and people carry it straight over to the Woodfire and end up disappointed. On this machine, with the even convection heat and often leaner baby backs, a full two-hour wrap plus a one-hour glaze pushes past tender into falling-off-the-bone mush that shreds when you pick it up. Competition cooks will tell you that’s actually overcooked; a proper rib holds to the bone until you bite it.
That’s why the timing above pulls the wrap back to around 1.5 to 2 hours and the glaze to 20 to 30 minutes. If you’re cooking big meaty spares, you can lean toward the longer end; for baby backs, err short and lean on the bend test.
The clock starts you off. The bend test finishes the job. Ribs are done when the rack cracks but doesn’t snap in two.
Baby Back vs. St. Louis vs. Spare: What Changes
The method is the same across cuts, but the timing and fit shift. Here’s how they compare for this specific machine.
| Baby back | St. Louis-cut | Spare ribs | |
|---|---|---|---|
| Fit on the grate | Usually lies flat | Often needs cutting | Longest — cut or roll to fit |
| Total cook time | ~4.5 hours | ~5 hours | ~5.5 to 6 hours |
| Meatiness | Leaner, more tender | Meaty, even | Meatiest, most fat |
| Wrap phase | Shorter (~1.5 hr) | ~1.75 hr | Up to 2 hr |
| Best for | A first cook, quicker dinner | All-round choice | Maximum flavor, longer cook |
Fitting a Full Rack in a Small Grill
This is the most common practical complaint, and it’s easy to solve. Baby backs generally lie flat on the grate as-is. A full rack of spares or St. Louis-cut is usually too long, so cut it in half and lay the two pieces side by side with a little gap for airflow, or use a rib rack accessory that stands them on edge to fit more in less footprint. Standing them up also lets you cook two racks at once, which is worth knowing if you’re feeding more than a couple of people. Whatever you do, don’t cram the pieces edge-to-edge touching, since that blocks smoke and steams the contact points unevenly.
When Your Ribs Don’t Come Out Right
They came out tough and chewy. Almost always undercooked, or the membrane was left on. Give them more time in the wrap and check that you peeled the back; tough ribs rarely fix themselves without more low-and-slow time.
They fell completely off the bone into shreds. Overcooked, usually too long in the wrap. Pull the wrap phase back next time and start the bend test earlier.
The bark is soft and pale. Not enough open-smoke time up front, or you wrapped too early. Let the bark fully set to a firm mahogany before wrapping.
The glaze burned or turned bitter. Sauce went on too early and its sugars scorched. Sauce belongs only in the final 20 to 30 minutes, never during the long smoke.
The rack dried out. Skipped spritzing, or the fat cap was trimmed too hard. Spritz during the open phase and don’t over-trim.
Common mistake: Judging ribs purely by an internal temperature number. Unlike a steak, ribs are done by texture, not a target temp — collagen breaks down over time at a given heat, so two racks at the same temperature can be worlds apart in tenderness. Use the bend test and the toothpick-slides-in-easily check, and treat any temperature reading as a rough signpost only.
Which Ninja Woodfire This Is Written For
Since the keyword lists blur these together: this recipe is for the Ninja Woodfire Grill and Smoker family — the standard Grill, the Pro, the XL, and the Pro Connect XL. They all share the Smoker mode and smoke box the method relies on, differing mainly in grate size and, on the Pro Connect models, a built-in leave-in thermometer. The larger XL units simply make fitting a full rack easier.
Ninja’s Woodfire Pizza Oven is a separate appliance built for high-heat pizza, not low-and-slow smoking, so it isn’t the tool for a proper rib cook. If you came here looking for a pizza-oven rib method, the honest answer is that the Grill/Smoker is the unit you want.
Make-Ahead, Storage, and Reheating
Ribs are great for making ahead, which surprises people. You can run them all the way through the wrap phase a day early, refrigerate them wrapped, then glaze and finish them for 30 minutes the next day — the flavor even deepens overnight. Fully cooked ribs keep 3 to 4 days in the fridge and freeze well for a couple of months, wrapped tightly in foil then a freezer bag.
Reheat low and slow to keep them from drying: a 250°F oven with a splash of juice and a foil cover for about 20 to 30 minutes brings them back nicely, and a few minutes unwrapped at the end re-tacks the glaze. Skip the microwave, which turns rib meat rubbery.
For a full plate, ribs go naturally with the same sides you’d run off this grill — a batch of smoky wings for a crowd, or something creamy and cool alongside like a make-ahead spinach dip to balance the richness.
Equipment That Genuinely Helps
Beyond the Woodfire and food-grade pellets, only a couple of things move the needle. A rib rack accessory is the one I’d actually recommend for this machine — it stands racks on edge so a long cut fits and you can cook two at once, which the flat grate can’t do. An instant-read thermometer helps you spot the wrap point even though ribs finish by feel, and on Pro Connect models it’s built in.
Everything else is standard: heavy-duty foil for the wrap, a basting brush for the glaze, a sharp knife for slicing between the bones, and a paper towel for that membrane. No need to buy anything fancy for those.

Ninja Woodfire Smoked Ribs
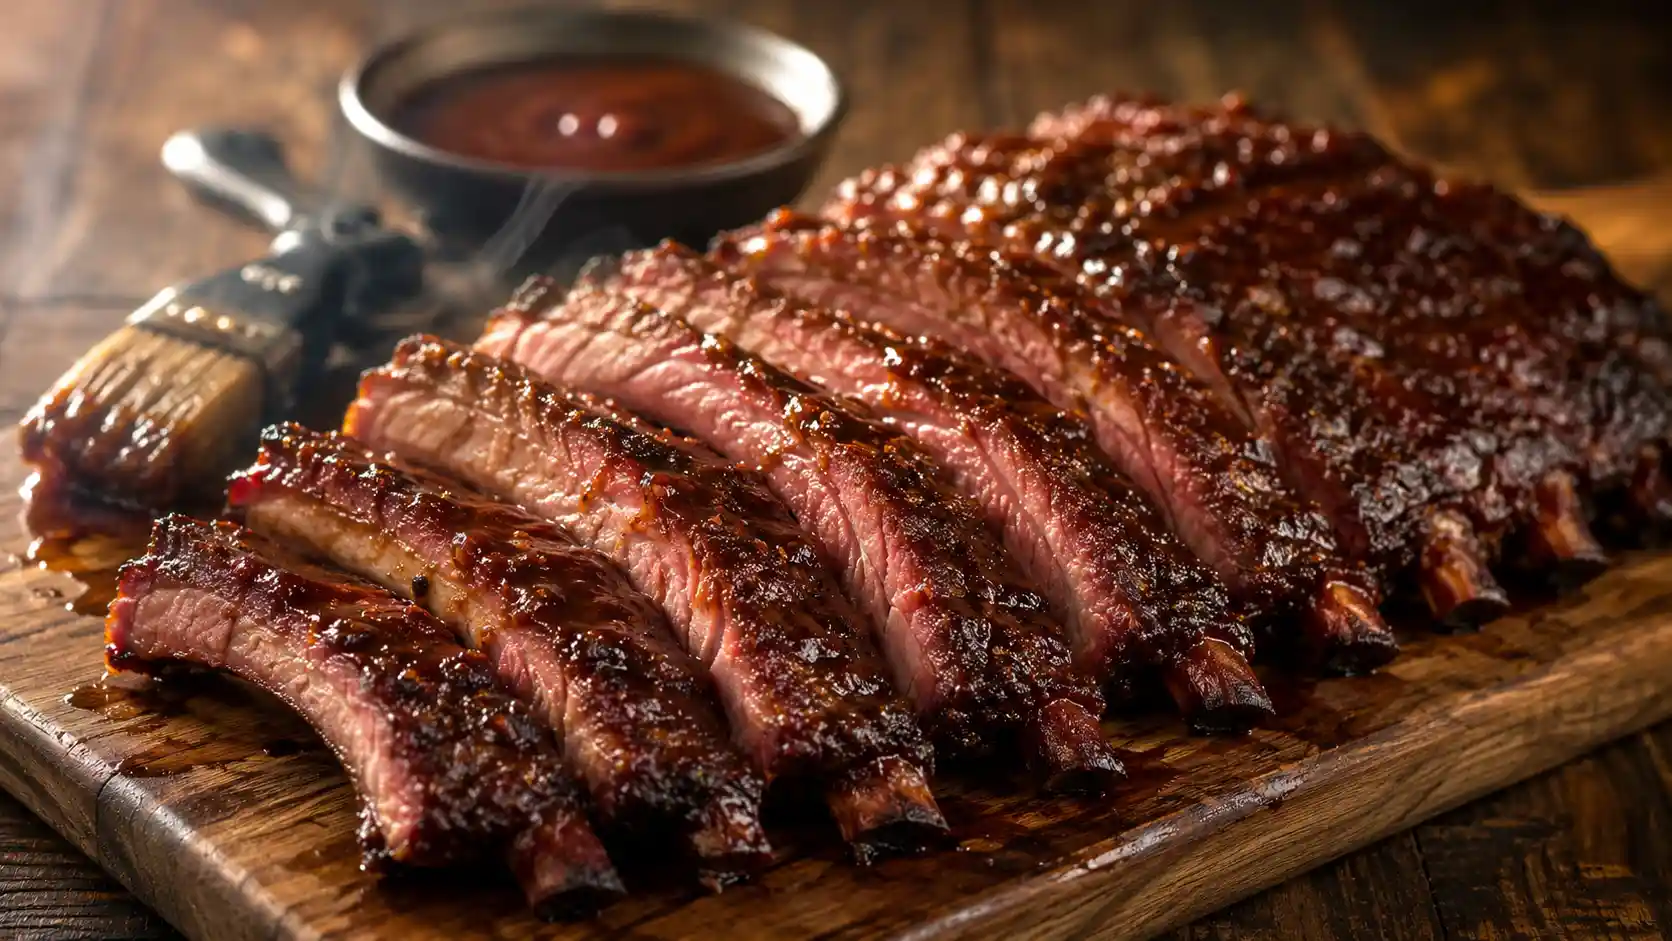
Tender, smoky pork ribs made on the Ninja Woodfire Grill and Smoker using a modified 3-2-1 method — open smoke for bark, a wrap to steam tender, and a short glaze to set the sauce. Doneness is judged by the bend test, not the clock, so it works on baby back, St. Louis, or spare ribs.
Ingredients
Equipment
Method
- Peel the membrane off the bone side of the rack. Pat dry, coat thinly with mustard on both sides, and season generously all over with the rub. Rest while the grill preheats or refrigerate overnight.
- Fill the smoke box with a scoop of pellets, press the Woodfire Flavor button, and set the grill to Smoker mode at 250°F. Cut the rack in half if it won’t lie flat.
- Smoke the ribs bone-side down at 250°F for 2.5 to 3 hours, keeping the lid shut for the first 90 minutes, then spritzing with vinegar as needed. The bark should be firm and dark and the internal temperature around 165°F.
- Wrap the rack tightly in a double layer of foil with the apple juice, bone-side up. Return to the grill at 250°F for 1.5 to 2 hours, checking from 1.5 hours.
- Unwrap, brush both sides with barbecue sauce, and cook unwrapped at 250°F for a final 20 to 30 minutes to set the glaze.
- Confirm doneness with the bend test — the rack should sag and crack but not break apart. Rest 10 minutes, then slice between the bones.
Video
Notes
Baby backs run shorter than spares; lean toward the shorter wrap time and use the bend test to finish.
Make-ahead: cook through the wrap a day early, refrigerate, then glaze and finish for 30 minutes the next day.
Leftovers keep 3 to 4 days refrigerated or a couple of months frozen. Reheat in a low oven with a splash of juice; avoid the microwave.
For cut-by-cut timing and troubleshooting, see the sections above.
Calories: Approximately 500 kcal per serving of a quarter rack (rough estimate only; varies widely with cut, trim, and sauce).
Frequently Asked Questions
What temperature and setting should I use for ribs on the Ninja Woodfire?
Use Smoker mode at 250°F for the whole cook, pressing the Woodfire Flavor button and loading the smoke box with a scoop of food-grade pellets. That single temperature carries you through the open smoke, the wrap, and the glaze without changing the dial. Cooking hotter to speed things up tends to dry the ribs before they turn tender.
How long do ribs take on the Ninja Woodfire Grill?
Baby backs run about 4.5 hours, St. Louis-cut around 5, and meaty spare ribs closer to 5.5 to 6 hours, using a modified 3-2-1 style timing. Those are planning numbers, though, not finish lines. Ribs are done by texture, so confirm with the bend test rather than pulling them strictly on the clock.
Does the standard 3-2-1 method work on the Ninja Woodfire?
Not quite as written, because the classic 3-2-1 was built for full-size smokers and big spare ribs. On the Woodfire’s even convection heat, a full two-hour wrap plus a one-hour glaze often overcooks the ribs into mush, especially leaner baby backs. Pull the wrap back to about 1.5 to 2 hours and the glaze to 20 to 30 minutes, then finish by feel.
How do I fit a full rack of ribs in the Ninja Woodfire?
Baby backs usually lie flat on the grate, but a full rack of spares or St. Louis-cut is often too long. Cut the rack in half and lay the pieces side by side with a small gap for airflow, or use a rib rack accessory that stands them on edge. Standing them up also lets you fit two racks at once for a bigger cook.
Do I have to remove the membrane from the ribs?
Yes, and it makes a real difference. The thin silverskin on the bone side never softens during cooking and blocks smoke and rub from reaching the meat, leaving you with a chewy layer. Work a knife under it at one end and peel it off with a dry paper towel for grip. Some racks come with it already removed, so check the back first.
How do I know when the ribs are actually done?
Ribs finish by texture, not a target temperature, so the bend test is your best tool: lift the rack from one end with tongs and it should sag and crack on the surface without breaking apart. A toothpick or probe should also slide into the meat between the bones with almost no resistance. If the rack shatters or the meat shreds off completely, it has gone past ideal into overcooked.
Can I make these ribs ahead, and how do I store and reheat them?
Ribs are excellent made ahead. Cook them through the wrap phase a day early, refrigerate them wrapped, then glaze and finish for about 30 minutes the next day. Fully cooked ribs keep 3 to 4 days in the fridge or a couple of months frozen in foil and a freezer bag. Reheat gently in a 250°F oven with a splash of juice and a foil cover, and avoid the microwave, which makes the meat rubbery.
Can I make beef ribs or country-style ribs with this method?
The general staged approach transfers, but the timing changes. Beef back ribs and short ribs are larger and fattier and usually need a longer cook to render, often past the times given here for pork, and they are done when probe-tender rather than by a pork rib bend test. Country-style ribs are a different cut that cooks faster, so watch them closely and pull once they are fork-tender.