Your favorite restaurant recipes, recreated at home — tested and easy to follow.


Brisket has a reputation as the graduation exam of backyard barbecue, and most of that reputation is really about the equipment. A traditional cook means a big smoker, a bag of charcoal or a hopper of pellets burning as fuel, and a long day of managing airflow so the temperature doesn’t swing. The Ninja Woodfire quietly removes almost all of that. The heat comes from an electric element, so it holds a set temperature on its own, and the wood pellets aren’t fuel — they sit in a little smoke box purely to flavor the meat. You get a real smoke ring and real bark from a machine that lives on a patio table.
What I appreciate most after running this cook a number of times is how forgiving the setup is for a first brisket. The convection fan inside the lid moves heat and smoke around the chamber evenly, which means you don’t get the hot-and-cold zones you fight on a cheap offset. The trade-off is capacity: these units are built around roughly a nine-pound brisket, sometimes up to twelve if it’s trimmed to fit, so this is a cook scaled for a family dinner or a small gathering rather than a block party. Work within that and it’s genuinely hard to mess up.
The recipe below is the sequence I’ve settled on — a Texas-style salt-and-pepper approach, an unwrapped smoke to build the crust, then a wrap to carry it home. If wings are more your usual speed on this grill, the Ninja Woodfire Grill chicken wings are a quick way to get comfortable with the smoke box before you commit a whole day to a brisket.
Why This Copycat Works
- Runs on the Woodfire’s Smoker mode at low heat, then a higher finish — matching how the machine’s convection actually cooks rather than fighting it.
- Doneness is called by internal temperature and a probe-feel test, so the same method works on a lean flat or a fatty packer.
- About 15 minutes of hands-on prep; the cook runs roughly 7 to 10 hours depending on size.
- Hardest part: leaving the lid shut. This small a chamber loses heat fast every time you peek.
Key Ingredients & Substitutions
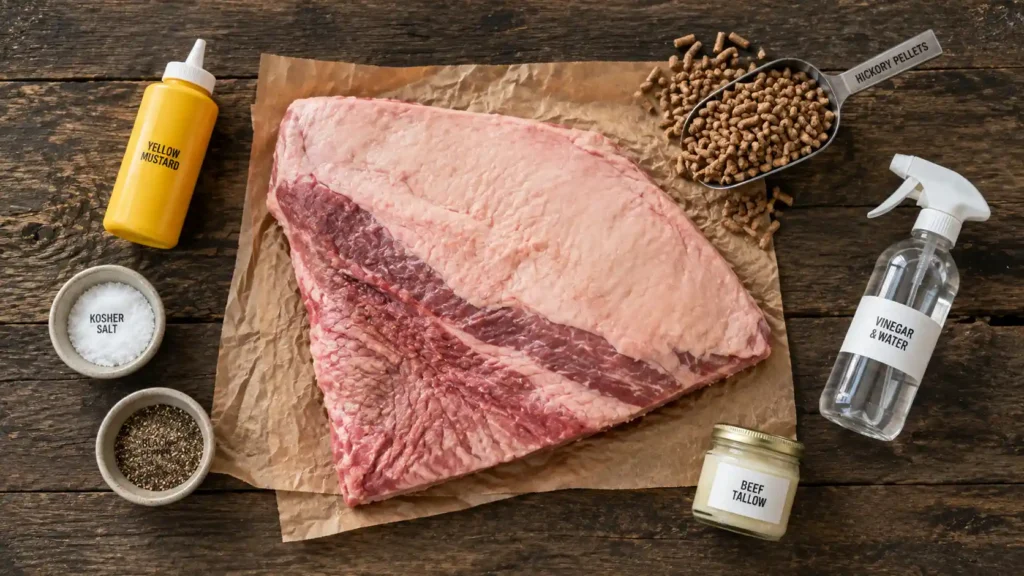
Beef brisket. A whole packer — the flat and the point still joined — is the ideal choice when it fits your unit, because the fattier point stays juicy and helps protect the leaner flat. If you can only fit or only want a flat, it works, but it’s less forgiving and dries out sooner, so you’ll lean harder on the wrap and the fat cap to keep it moist. Whole packers usually come from a warehouse club or a full-service butcher counter rather than the pre-packed meat case, so you may need to ask ahead.
Yellow mustard. A thin smear all over the raw brisket acts as a binder, giving the rub something to hold onto while the bark forms. It has no lingering flavor once cooked. A light coat of neutral oil, mayonnaise, or even a splash of hot sauce does the same job if that’s what you have.
Coarse kosher salt and coarse-ground black pepper. This is the classic Central Texas rub, and on brisket it genuinely doesn’t need more. The coarse grind is the point — it builds that craggy, dark crust, where fine grinds just dissolve into the surface. Roughly equal parts of each. Both live in the everyday spice aisle.
Garlic powder and smoked paprika (optional). Not strictly traditional, but a spoon of each adds savory depth and reinforces the bark color if you want a little more going on than salt and pepper. Leave them out for the purist version.
Food-grade smoking pellets. The Woodfire needs only a scoop at a time, since they flavor rather than fuel. A robust, hickory-forward blend stands up to beef better than a light fruitwood. Critically, use only pellets labeled food-safe for cooking — never heating-stove pellets, which can be chemically treated.
Beef tallow or beef broth (for the wrap). Brushing rendered tallow onto the brisket before wrapping adds fat back into a lean cut and helps it push through the back half of the cook without drying. Tallow is sometimes sold near the shortening or specialty fats; beef broth is an easy stand-in that adds moisture if not fat.
How to Smoke Brisket on the Ninja Woodfire
The plan is two phases. First you smoke the seasoned brisket uncovered at a low temperature so it takes on smoke and forms a firm crust. Then, once the bark is set and the interior has climbed into the stall, you wrap it and raise the heat slightly to power through to tenderness. Hands-on time is about fifteen minutes total; the cook itself runs roughly seven hours for a small flat and up to ten for a full packer. Splitting the cook this way lets the crust and the tenderness each develop at the temperature that suits them.
Step 1: Trim and Season the Brisket
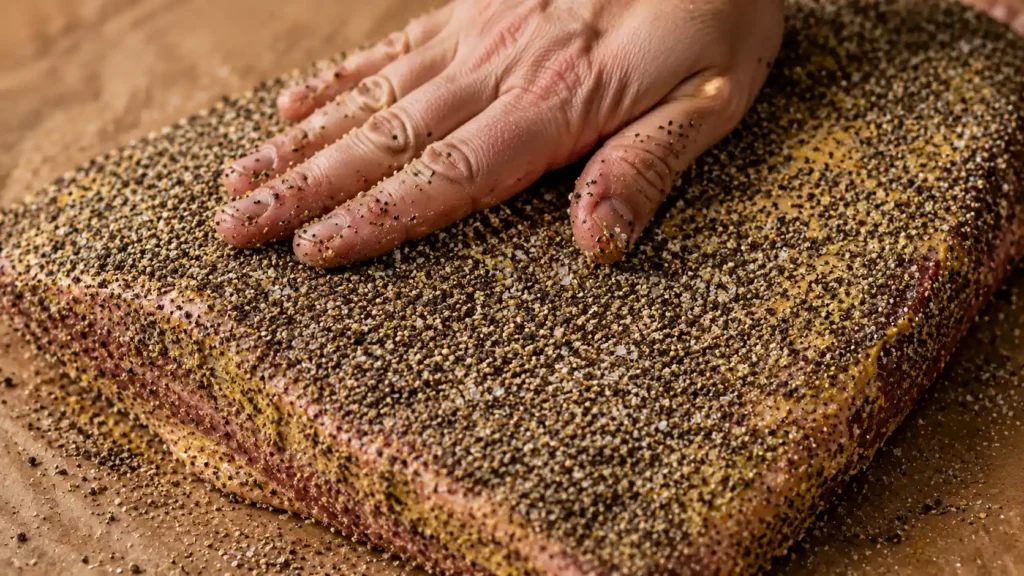
Trim the fat cap down to about a quarter inch — thick enough to protect the meat, thin enough to let smoke and rub reach it — and cut away any hard lumps of fat and silverskin from the sides, since those never render. Pat the whole thing dry, smear a thin layer of yellow mustard over every surface, then coat it heavily with your salt-and-pepper rub, pressing it on so it sticks. Aim to nearly hide the meat under seasoning. For the best flavor, season it and leave it uncovered in the fridge overnight; if you’re short on time, an hour at room temperature still works.
Step 2: Load the Smoke Box and Set Smoker Mode
Fill the smoke box with one scoop of food-grade pellets, press the Woodfire Flavor button, and set the unit to Smoker mode at 225°F. If your model has a leave-in probe — the Pro Connect line does — insert it into the thickest part of the flat now so you’re not opening the lid later to check. This step is straightforward, so no photo is needed here.
Step 3: Smoke Uncovered to Build the Bark
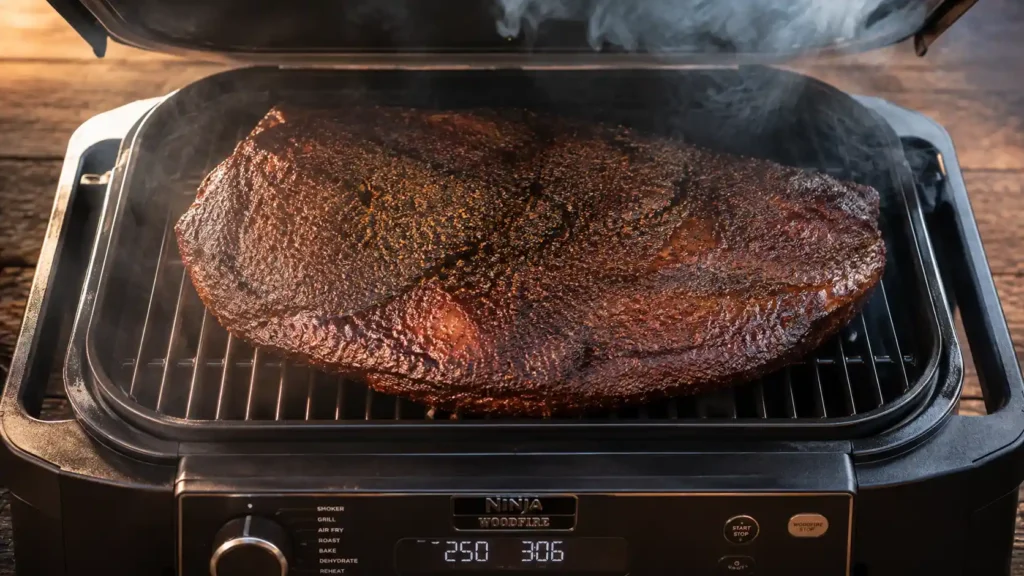
Set the brisket fat-side up in the middle of the grate and close the lid. Let it smoke undisturbed at 225°F — resist opening it at all for the first two hours, because each time you lift the lid this small chamber has to claw its way back to temperature. After that, glance every 45 minutes or so; if the surface looks dry or is darkening unevenly, mist it with a 50/50 spray of apple cider vinegar and water. This phase runs about 3 to 4 hours, and you’re moving on once the internal temperature reaches roughly 165°F and the crust is dark, firm, and no longer tacky to a light touch.
Pro Tip: Somewhere around 150 to 165°F the temperature will seem to freeze in place, sometimes for an hour or more. That’s the stall, and it’s the surface sweating and cooling itself — not a broken probe or a dying machine. The instinct to crank the heat and blast through it is exactly what dries out a brisket. Hold your setting and wait; the wrap in the next step is the right way to move it along.
Step 4: Wrap and Finish to Probe-Tender
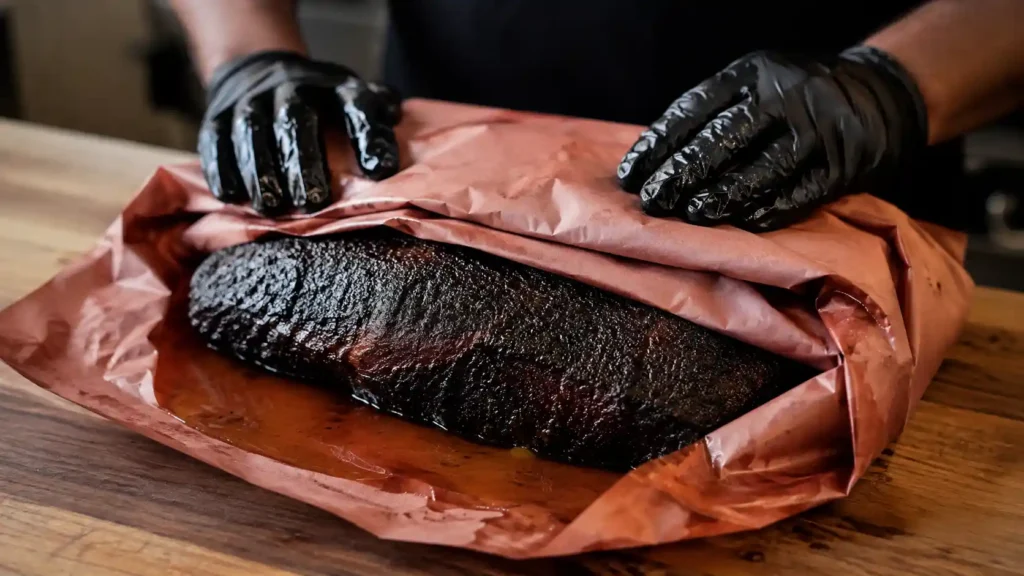
Tear off a couple of large sheets of butcher paper or heavy-duty foil. Brush about a half cup of melted beef tallow (or a few splashes of broth) over the brisket, then wrap it snugly, folding the seams closed so steam stays trapped. Return it to the grate, bump the temperature up to 250°F, and keep cooking. This stretch usually takes another 2 to 4 hours. Begin checking once the internal temperature passes 200°F: slide an instant-read probe through the wrap in a few spots, and you want it to glide in with almost no resistance, the way it would into softened butter. Depending on the brisket, that tender feeling can land anywhere from 200°F to a bit past 205°F, so trust the feel over the exact number.
Step 5: Rest, Then Slice Across the Grain
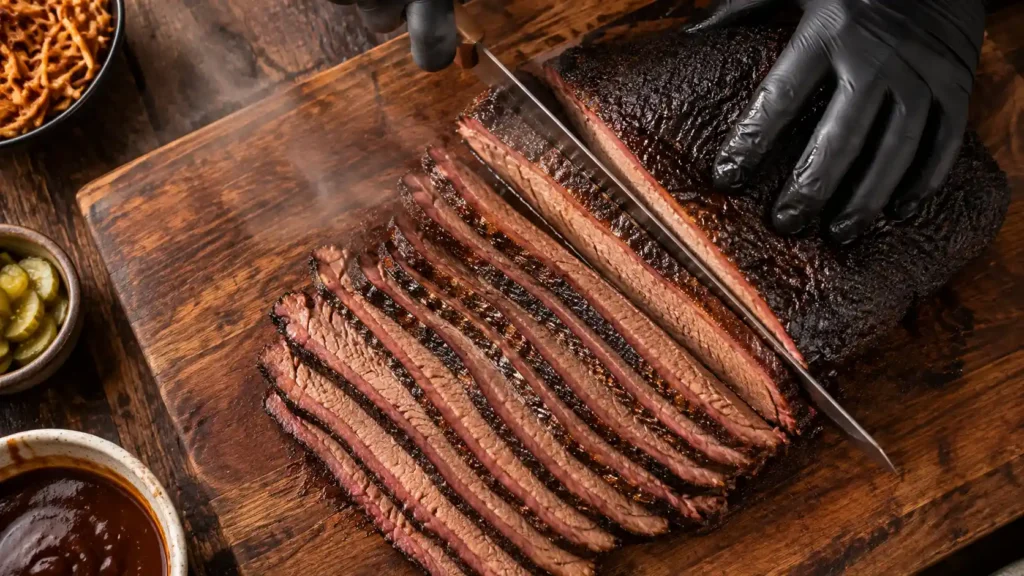
Take the wrapped brisket off the grill and let it rest, still wrapped, for at least 45 minutes to an hour — a dry cooler or a nest of kitchen towels holds the heat nicely. Cutting too soon lets all the juice you worked for run out onto the board. When it’s rested, unwrap, and if you’re serving both muscles, separate the point from the flat along the fat seam. Slice each piece against its grain into strips about the thickness of a pencil, re-checking the grain direction when you move from the flat to the point, since they run differently.
Reading Doneness Instead of the Clock
The most common way a first Woodfire brisket goes wrong is trusting a time estimate over the meat itself. Because the convection design cooks evenly and often a little faster than an open-air smoker, a brisket you expected to take ten hours might be probe-tender at seven and a half — and if you’d left it on for the “full” ten it would be dry and overcooked. Every reliable finish cue is physical: the internal temperature climbing into the low 200s, and the probe sliding in without resistance. Time is only ever a rough planning number.
That’s also why a good thermometer matters more than any other single tool for this cook. The temperature isn’t a fixed target you hit and stop at; it’s a window you use alongside the feel test.
Brisket is done when it feels done, not when the timer says so. The thermometer confirms; it doesn’t decide.
Keeping a Lean Flat From Drying Out
If you’re cooking a flat rather than a whole packer, dryness is the risk you’re managing the entire time, because the flat has far less internal fat to keep it moist. Three things stack the odds in your favor. Leave the fat cap at a full quarter inch and cook fat-side up, so it renders down over the meat. Be generous with the tallow at the wrap stage — this is where a lean cut gets the fat it’s missing. And pull it the moment it probes tender rather than letting it ride; a flat has a much narrower window between tender and dry than a fatty point does. On a whole packer, the point is forgiving enough that you can relax on all three.
Which Ninja Woodfire Are You Using?
Worth clearing up, since the keyword lists mix these together: the recipe above is written for the Ninja Woodfire Grill and Smoker family, which includes the standard Grill, the Pro, the Pro XL, and the Pro Connect XL. Those all share the Smoker mode and smoke box this method relies on, differing mainly in capacity and, on the Pro Connect models, a built-in leave-in thermometer that makes the long cook easier to monitor without opening the lid.
Ninja also makes a separate Woodfire Pizza Oven, which is a different appliance built for high-heat pizza rather than low-and-slow smoking. It’s not the right tool for a full brisket cook, so if you landed here looking for a pizza-oven brisket method, the honest answer is that the Grill/Smoker is the unit you want for this.
| Model family | Brisket capacity | Built-in probe | Best for |
|---|---|---|---|
| Woodfire Grill (standard) | Around a 9 lb brisket, trim-dependent | Model-dependent | A first brisket, smaller cuts |
| Woodfire Pro / Pro XL | Larger, fits bigger packers | Varies by model | More room, same method |
| Pro Connect XL | Larger packers | Yes | Hands-off temp monitoring |
| Woodfire Pizza Oven | Not suited to brisket | No | High-heat pizza, not smoking |
When Things Go Sideways
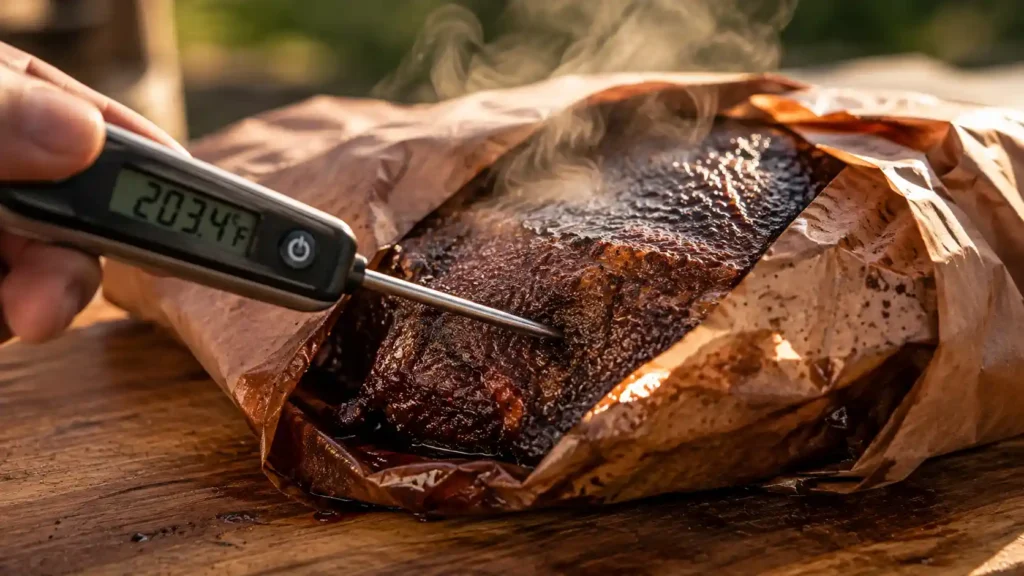
The temperature stalled and won’t budge. Expected between roughly 150 and 170°F. If it’s been over 90 minutes with no movement at all, confirm your pellets are still going and the lid is sealing, then wrap to push through it.
It reached 203°F but still feels stiff. Not done yet. That number is a guide, not a finish line — some briskets need 207 or 208°F before the collagen fully softens. Give it another 20 to 30 minutes and probe again.
The bark came out pale and soft. Usually too little smoke time up front or a wrap that went on too early. Next time, hold off wrapping until the crust is genuinely firm, and check the smoke box hourly so it doesn’t burn out unnoticed.
Pellets keep running out mid-cook. Each scoop smokes for only about 30 to 40 minutes, though the electric element keeps cooking regardless. Refill once or twice across the first few hours; after the wrap, extra smoke barely reaches the meat anyway.
The finished slices fall apart. Overcooked, or sliced with the grain instead of across it. Pull a touch earlier next time and double-check the grain direction on each muscle before you cut.
Storing and Reusing the Leftovers
Sliced brisket keeps about 3 to 4 days in a sealed container in the fridge. The trick with reheating is gentle, moist heat: a low oven around 250°F with a splash of beef broth and a foil cover brings it back without toughening it, whereas a microwave tends to seize the meat up and dry it out. It also freezes well for a couple of months — lay slices flat in a freezer bag with a little of their juices and press out the air.
Leftovers are almost better than the first plate. Chop the point into chili, pile the flat onto a bun with a sharp sauce, or fold it through fried rice. If you’re feeding a crowd off the one machine, running a batch of crispy chicken wings through the same grill gives you a second protein without a second appliance.
The Gear That Genuinely Matters
Beyond the Woodfire itself and a bag of food-grade pellets, only a couple of things meaningfully change the outcome. A good instant-read or leave-in probe thermometer is close to non-negotiable on a cook this long — it’s the difference between finishing by feel and guessing, and on the Pro Connect models it’s already built in. Butcher paper is my preference over foil for the wrap, since it breathes a little and keeps the bark firmer, though foil works fine and is more likely already in your drawer.
Everything else is standard kitchen kit: a sharp knife for trimming and slicing, a board big enough for a whole packer, and a cooler or some towels for the rest. There’s no need to spend money on anything specialized beyond the thermometer.
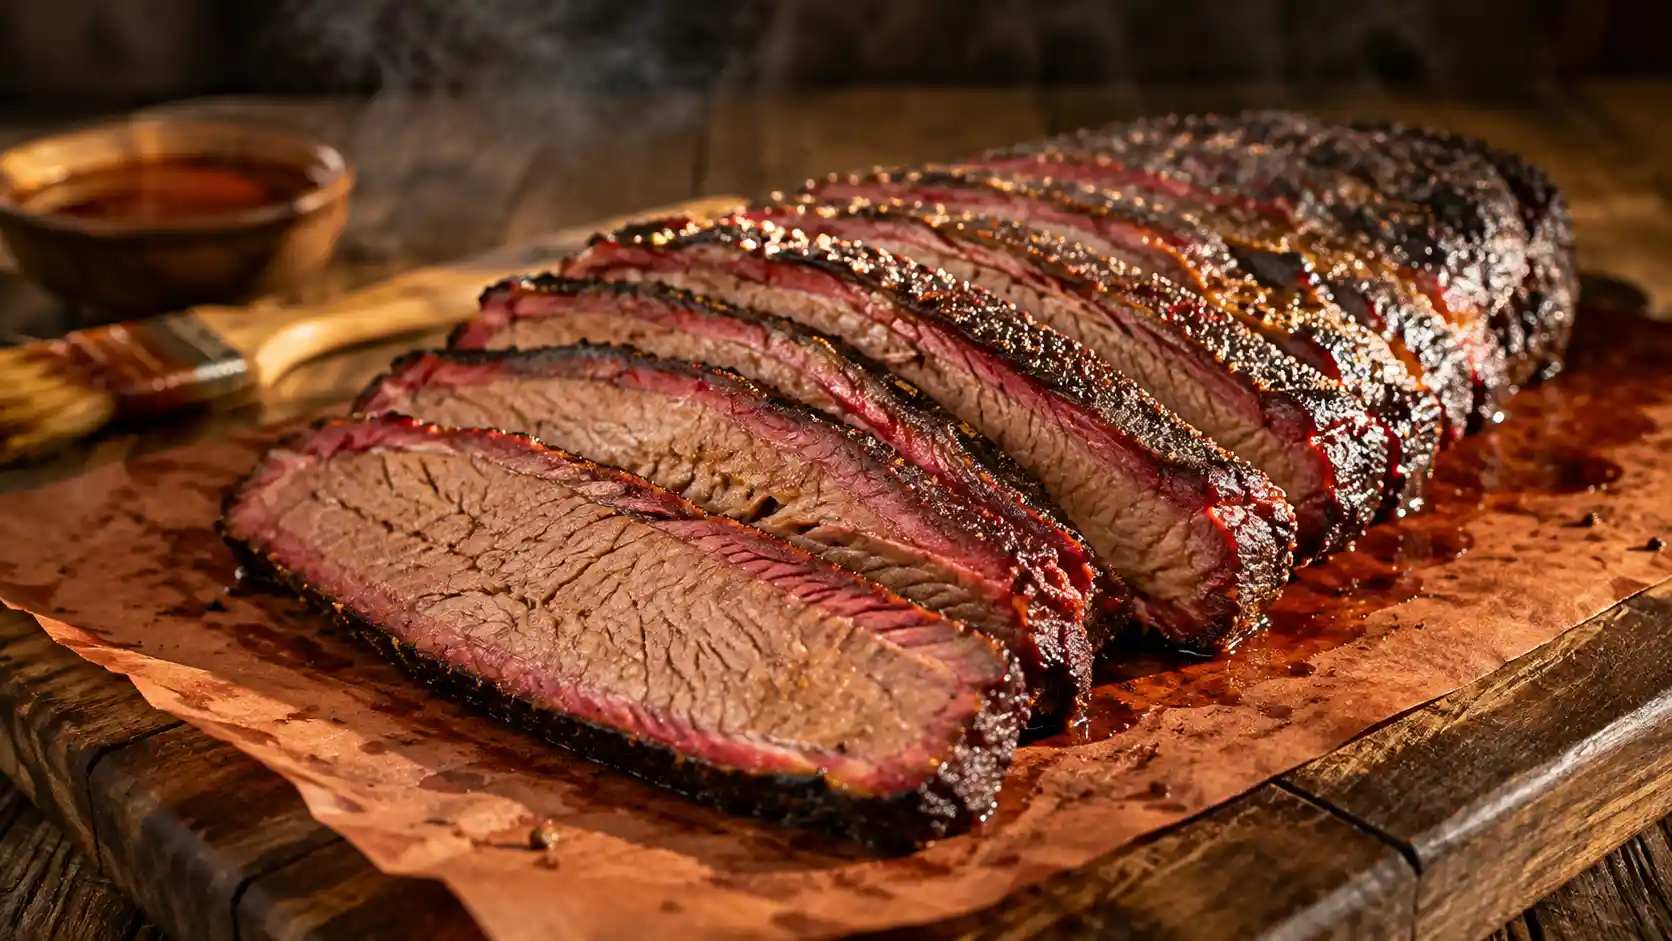

Ninja Woodfire Smoked Brisket
A beginner-friendly brisket for the Ninja Woodfire Grill and Smoker, smoked low to build a dark bark, then wrapped and finished to probe-tender. Doneness is judged by temperature and feel rather than a fixed time, so it works on a lean flat or a whole packer alike.
Ingredients
Equipment
Method
- Trim the fat cap to a quarter inch and remove hard fat and silverskin. Pat dry, coat thinly with mustard, and season heavily on all sides with salt, pepper, and the optional garlic powder and paprika. Refrigerate uncovered overnight, or rest at room temperature 1 hour.
- Fill the smoke box with a scoop of pellets and press the Woodfire Flavor button. Set the grill to Smoker mode at 225°F, and insert a probe into the thickest part of the flat if available.
- Place the brisket fat-side up in the center and close the lid. Smoke at 225°F without opening for the first 2 hours, then check every 45 minutes, spritzing dry spots. Continue until the internal temperature reaches about 165°F and the bark is firm and dark, roughly 3 to 4 hours.
- Brush with tallow or broth and wrap tightly in butcher paper or foil. Return to the grill, raise the heat to 250°F, and cook another 2 to 4 hours.
- From 200°F internal, probe through the wrap in several spots; it’s done when the probe meets almost no resistance, which may take until just past 205°F.
- Rest wrapped in a cooler or towels at least 1 hour. Unwrap, separate the point and flat if desired, and slice each against its own grain.
Video
Notes
If a whole packer won’t fit, ask your butcher to trim it to size, or separate the point and flat and cook them side by side.
Leftovers keep 3 to 4 days refrigerated or a couple of months frozen. Reheat gently in a low oven with a little broth; skip the microwave.
Cooking a lean flat: keep the full fat cap, be generous with tallow at the wrap, and pull the moment it probes tender.
For model differences and doneness troubleshooting, see the sections above.
Calories: Approximately 280 kcal per 6-ounce serving of trimmed brisket (rough estimate only; varies with the fat content of your cut).
Frequently Asked Questions
What Ninja Woodfire setting and temperature is best for brisket?
Use Smoker mode at 225°F for the first, unwrapped phase to build bark and take on smoke, then raise it to 250°F once you wrap the brisket to finish it. Press the Woodfire Flavor button and load the smoke box with a scoop of food-grade pellets so it actually smokes rather than just roasting. Cooking the whole thing at one temperature is a common reason the bark stays weak or the meat finishes unevenly.
How long does a brisket take on the Ninja Woodfire?
Plan for roughly 7 hours for a smaller flat and up to 10 hours for a full packer, but treat that only as a planning estimate. The Woodfire’s convection fan often cooks a little faster than a traditional smoker, so the real finish cues are an internal temperature in the low 200s and a probe that slides in with almost no resistance. Pulling by the clock instead of by feel is the top cause of a disappointing result.
What size brisket fits in a Ninja Woodfire?
Most units are built around a brisket of about 9 pounds, and can sometimes take up to 12 pounds if it’s trimmed to fit the oval grate. The Pro and Pro XL models give you more room for larger packers. If yours is too long, trim the point end into a rounder shape, separate the point and flat to cook side by side, or ask the butcher to size it down before you buy.
Why is my brisket temperature stuck around 160°F?
That’s the stall, and it’s completely normal. As the surface moisture evaporates it cools the meat, holding the internal temperature flat for anywhere from 45 minutes to well over an hour. Don’t raise the heat to force it, which tends to dry out the flat. Wrapping the brisket at this point traps moisture and moves it through the stall the right way.
Do I have to wrap the brisket, and when?
Wrapping isn’t mandatory, but it’s the easiest way to keep the meat moist and speed up the back half of the cook, which matters on a machine this size. Wait until the bark is firm and the internal temperature is around 165°F, then wrap tightly in butcher paper or foil with a little beef tallow. You can smoke it unwrapped the whole way for a firmer bark, but expect a longer cook and a higher risk of a dry flat.
Can I make brisket in the Ninja Woodfire Pizza Oven?
The Pizza Oven is a separate appliance designed for high-heat pizza, not low-and-slow smoking, so it isn’t the right tool for a brisket. This recipe is written for the Ninja Woodfire Grill and Smoker family, including the Pro, Pro XL, and Pro Connect XL, which all have the Smoker mode and smoke box that brisket needs. If brisket is your goal, use the Grill/Smoker rather than the Pizza Oven.
How much smoke flavor do the pellets really add?
A single scoop of pellets smokes for about 30 to 40 minutes, and refilling once or twice across the first few hours is plenty, since most of the smoke is absorbed early while the meat is still cool and moist. The electric element keeps cooking even after the smoke fades, so you won’t stall the cook by not refilling. Adding pellets after you’ve wrapped does little, because the wrap blocks most of the smoke.
How do I store and reheat leftover brisket?
Keep sliced brisket in an airtight container for 3 to 4 days in the fridge, or freeze it flat in a bag with some of its juices for a couple of months. To reheat without drying it out, use a low oven around 250°F with a splash of beef broth and a foil cover. Avoid the microwave, which tends to toughen the meat and drive out moisture.